Quantum Libris is my digital writing sanctuary, a wordcel wet dream of a website where I experiment with ideas and share my thoughts on topics that fascinate me.
Currently, I've only published a small collection of writings due to time constraints, but there's much more in the pipeline. I'm exploring themes that span from technology and science to philosophy and culture — all through my unique lens.
One of my visions for this platform is to expand it into a collaborative space where I can feature works from friends and fellow writers. I'm in the process of developing features that would make this possible, creating a digital anthology of diverse perspectives.
If you're interested in contributing or have suggestions for the platform, please reach out! Your interest might be just the motivation I need to accelerate the development of these collaborative features.
This is a project I started because shipping 3D printed items is both silly and inefficient; you should be able to simply send a file somewhere and have it materialize.
I ended up creating Maker Mesh - a platform that connects people who need 3D printed objects with nearby makers who have 3D printers.
The concept is simple: when someone orders a 3D printed item, instead of shipping it across the country, I would find a maker in their local area who could print and deliver it for a fee. This approach dramatically reduced shipping costs, enabled much faster delivery times, and created income opportunities for people with 3D printers.
It also was supposed to be proof that distributed, on-demand manufacturing could beat centralized production and traditional shipping for a niche subset of plastic items. Unfortunately during this time I was not taking care of myself, became moderately depressed, and also I am somewhat of the opinion that 3D printed things need to advance in a bunch of ways (like maybe 3D printed robots?) to make this a profitable endeavor so this project is still pending.

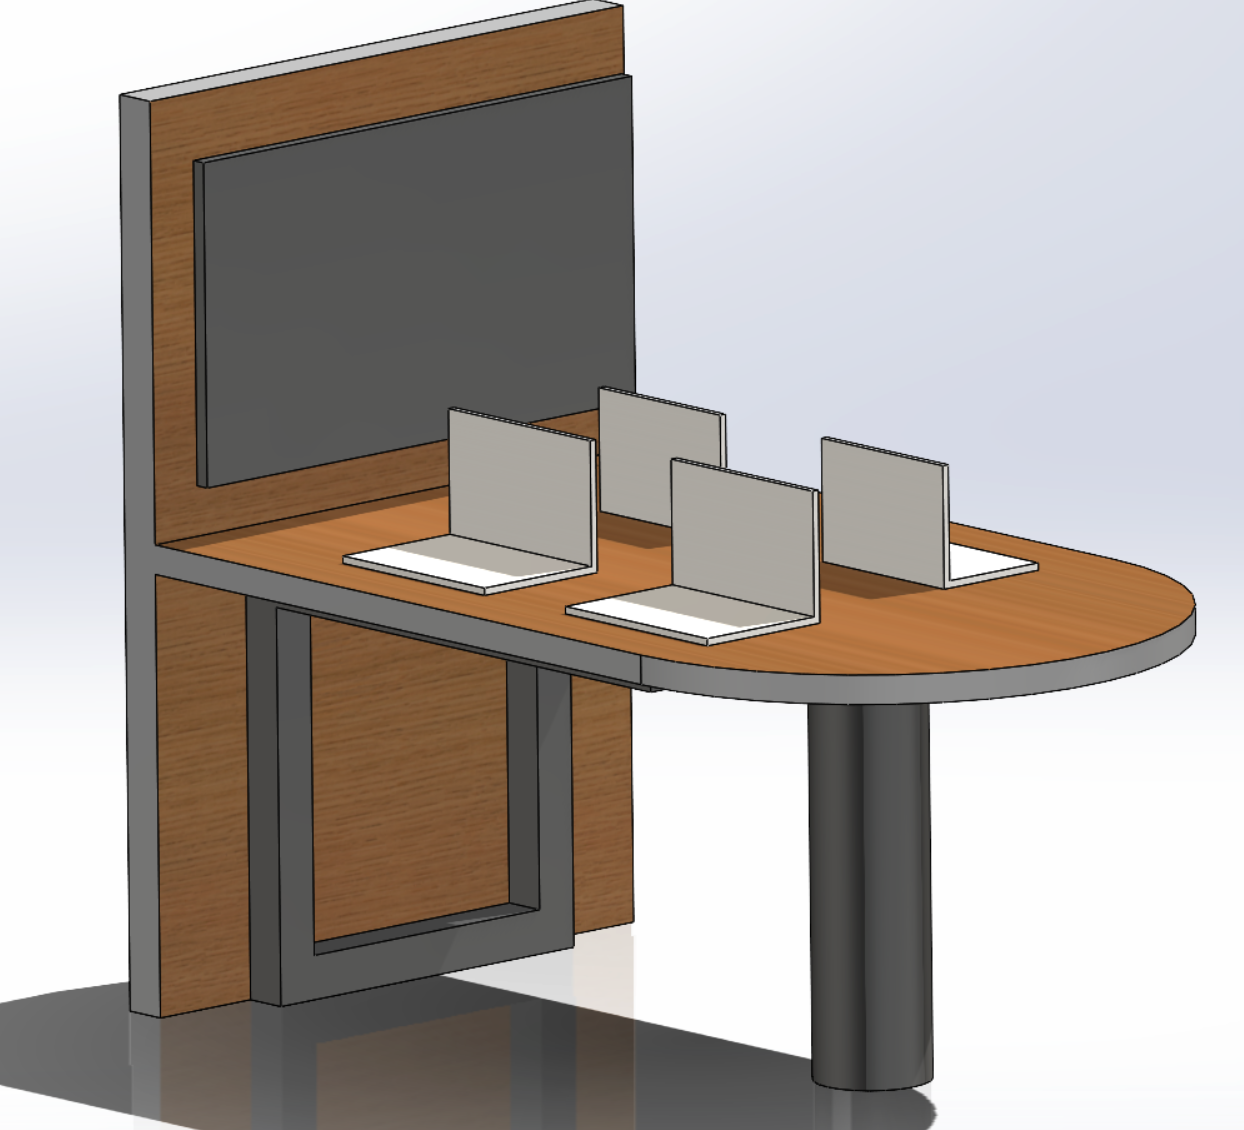
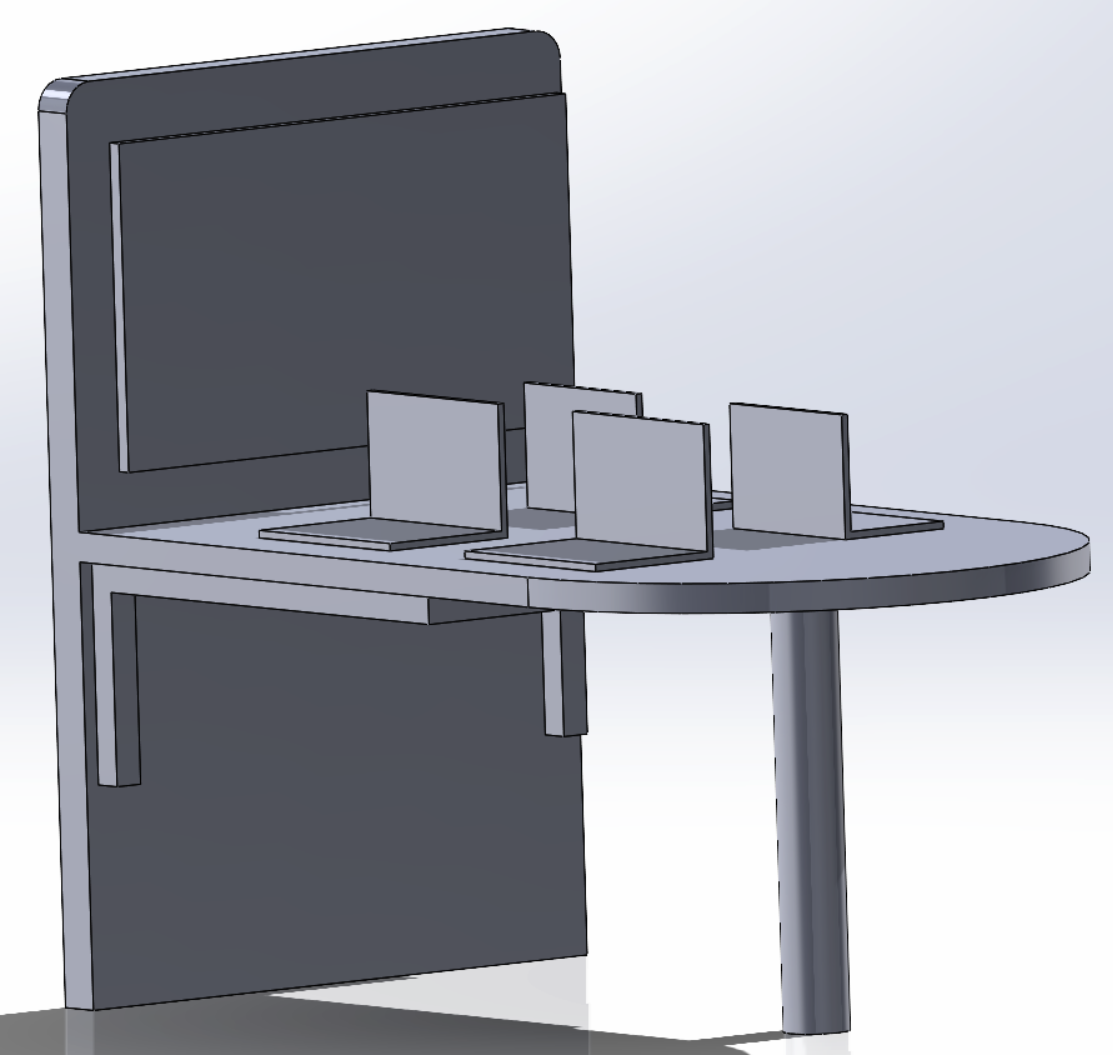
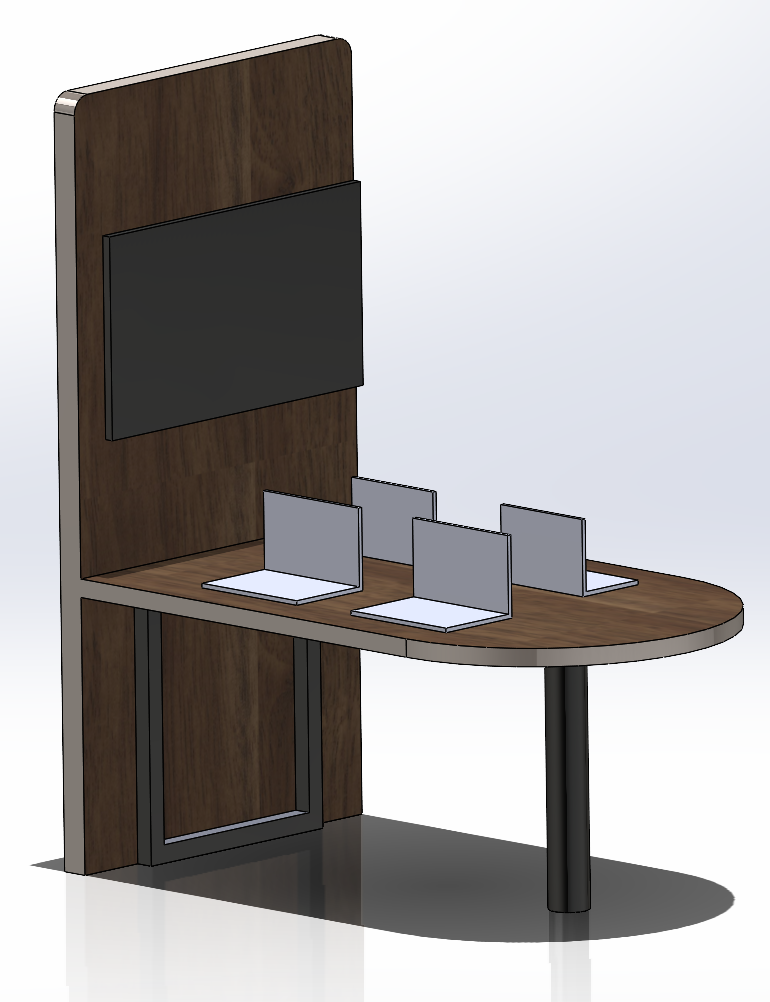

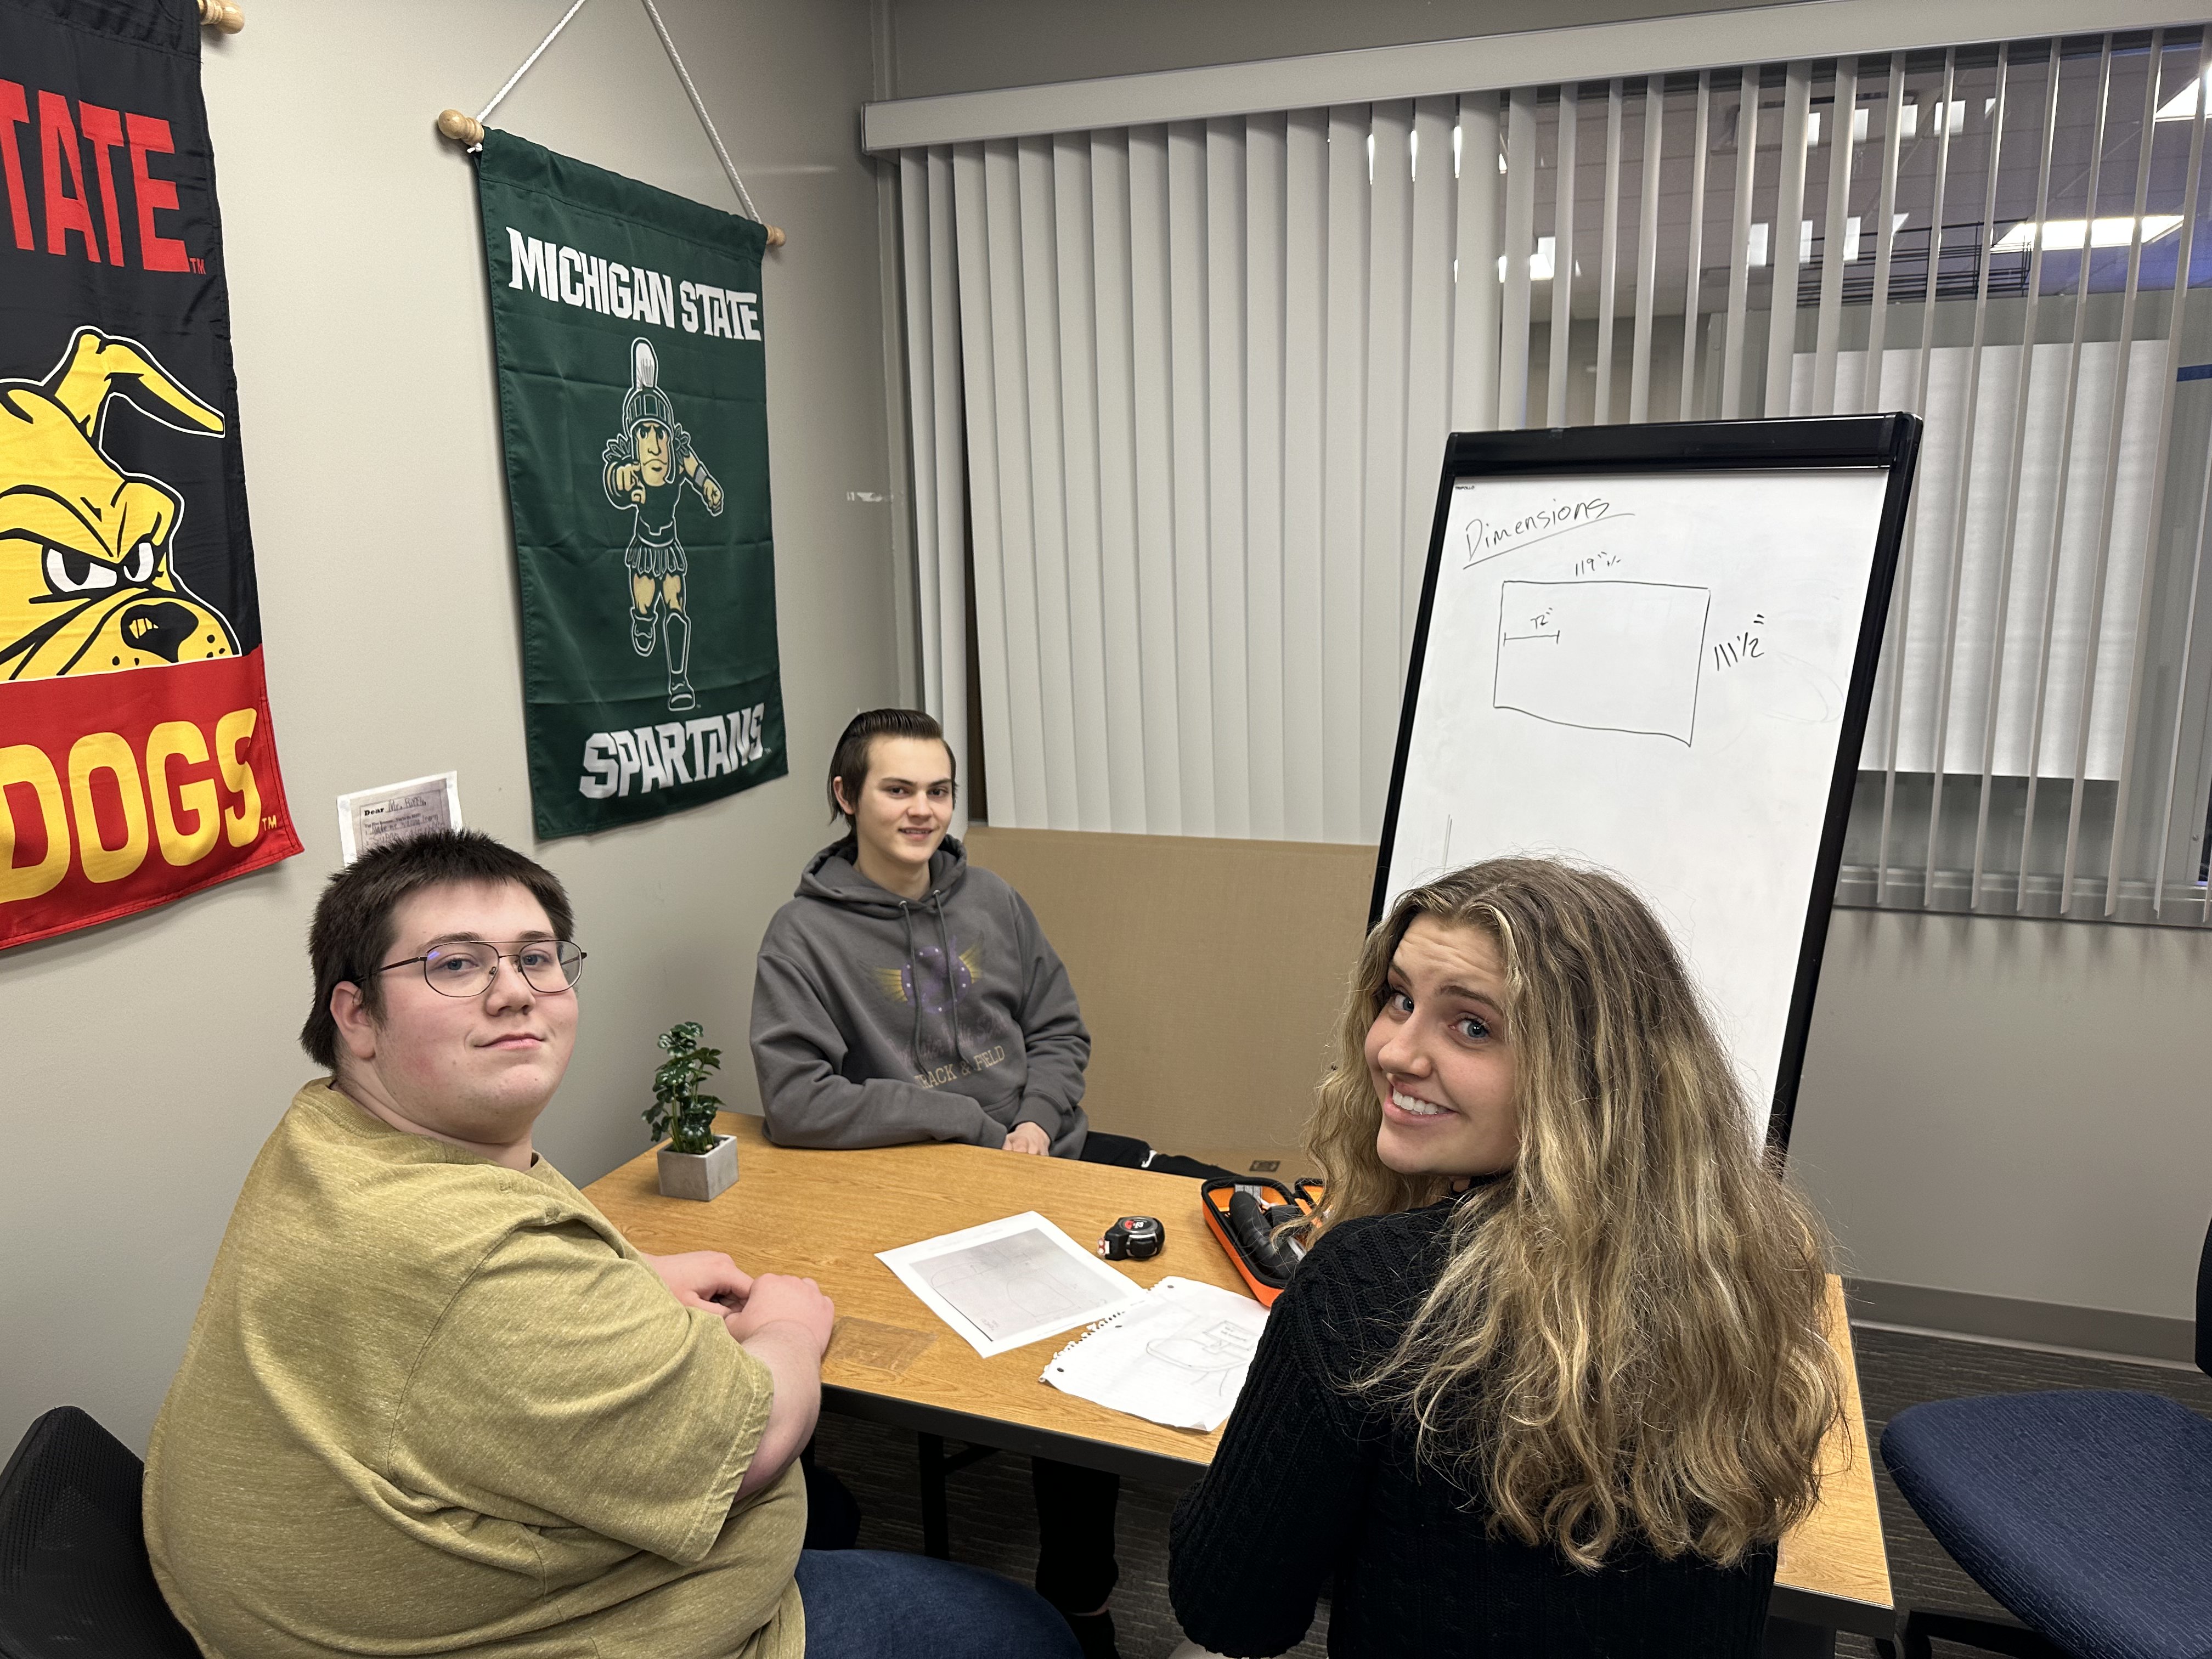
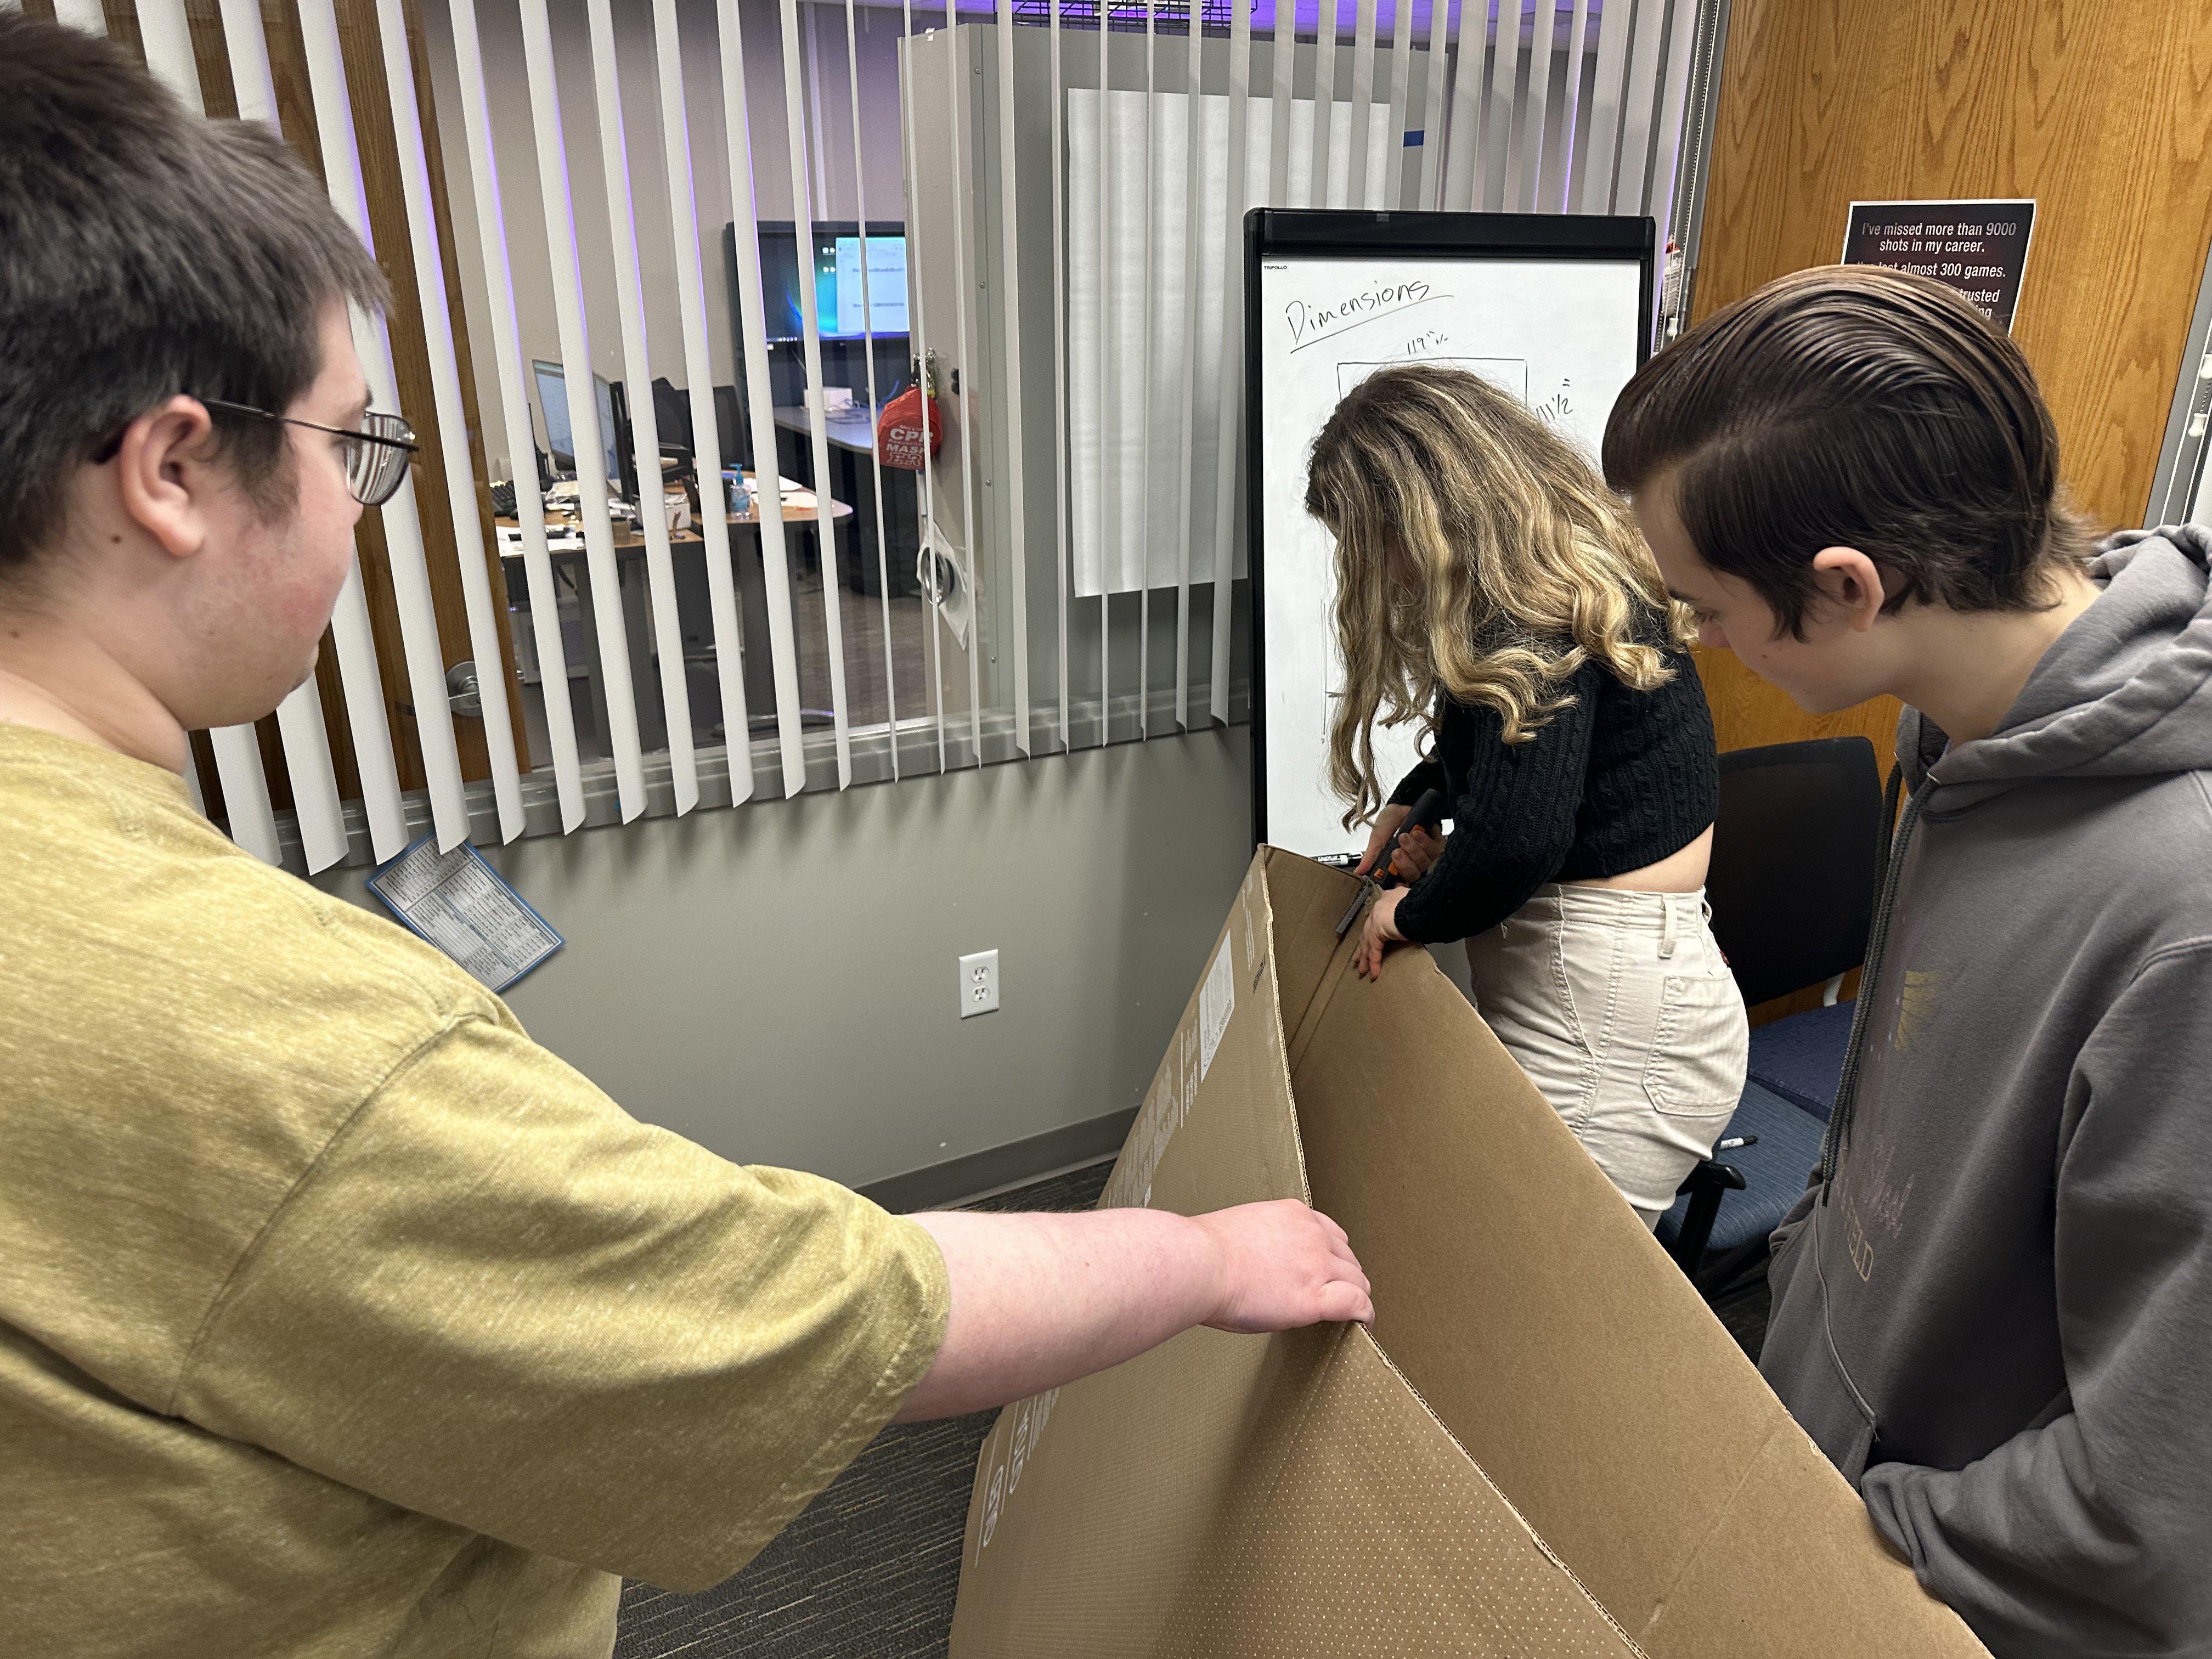
After speedrunning and completing the mechatronics curriculum a few weeks early, I was selected along with two other high-performing classmates to work on a special external project. We were tasked with designing and producing a custom desk for Mr. Hughes and co!
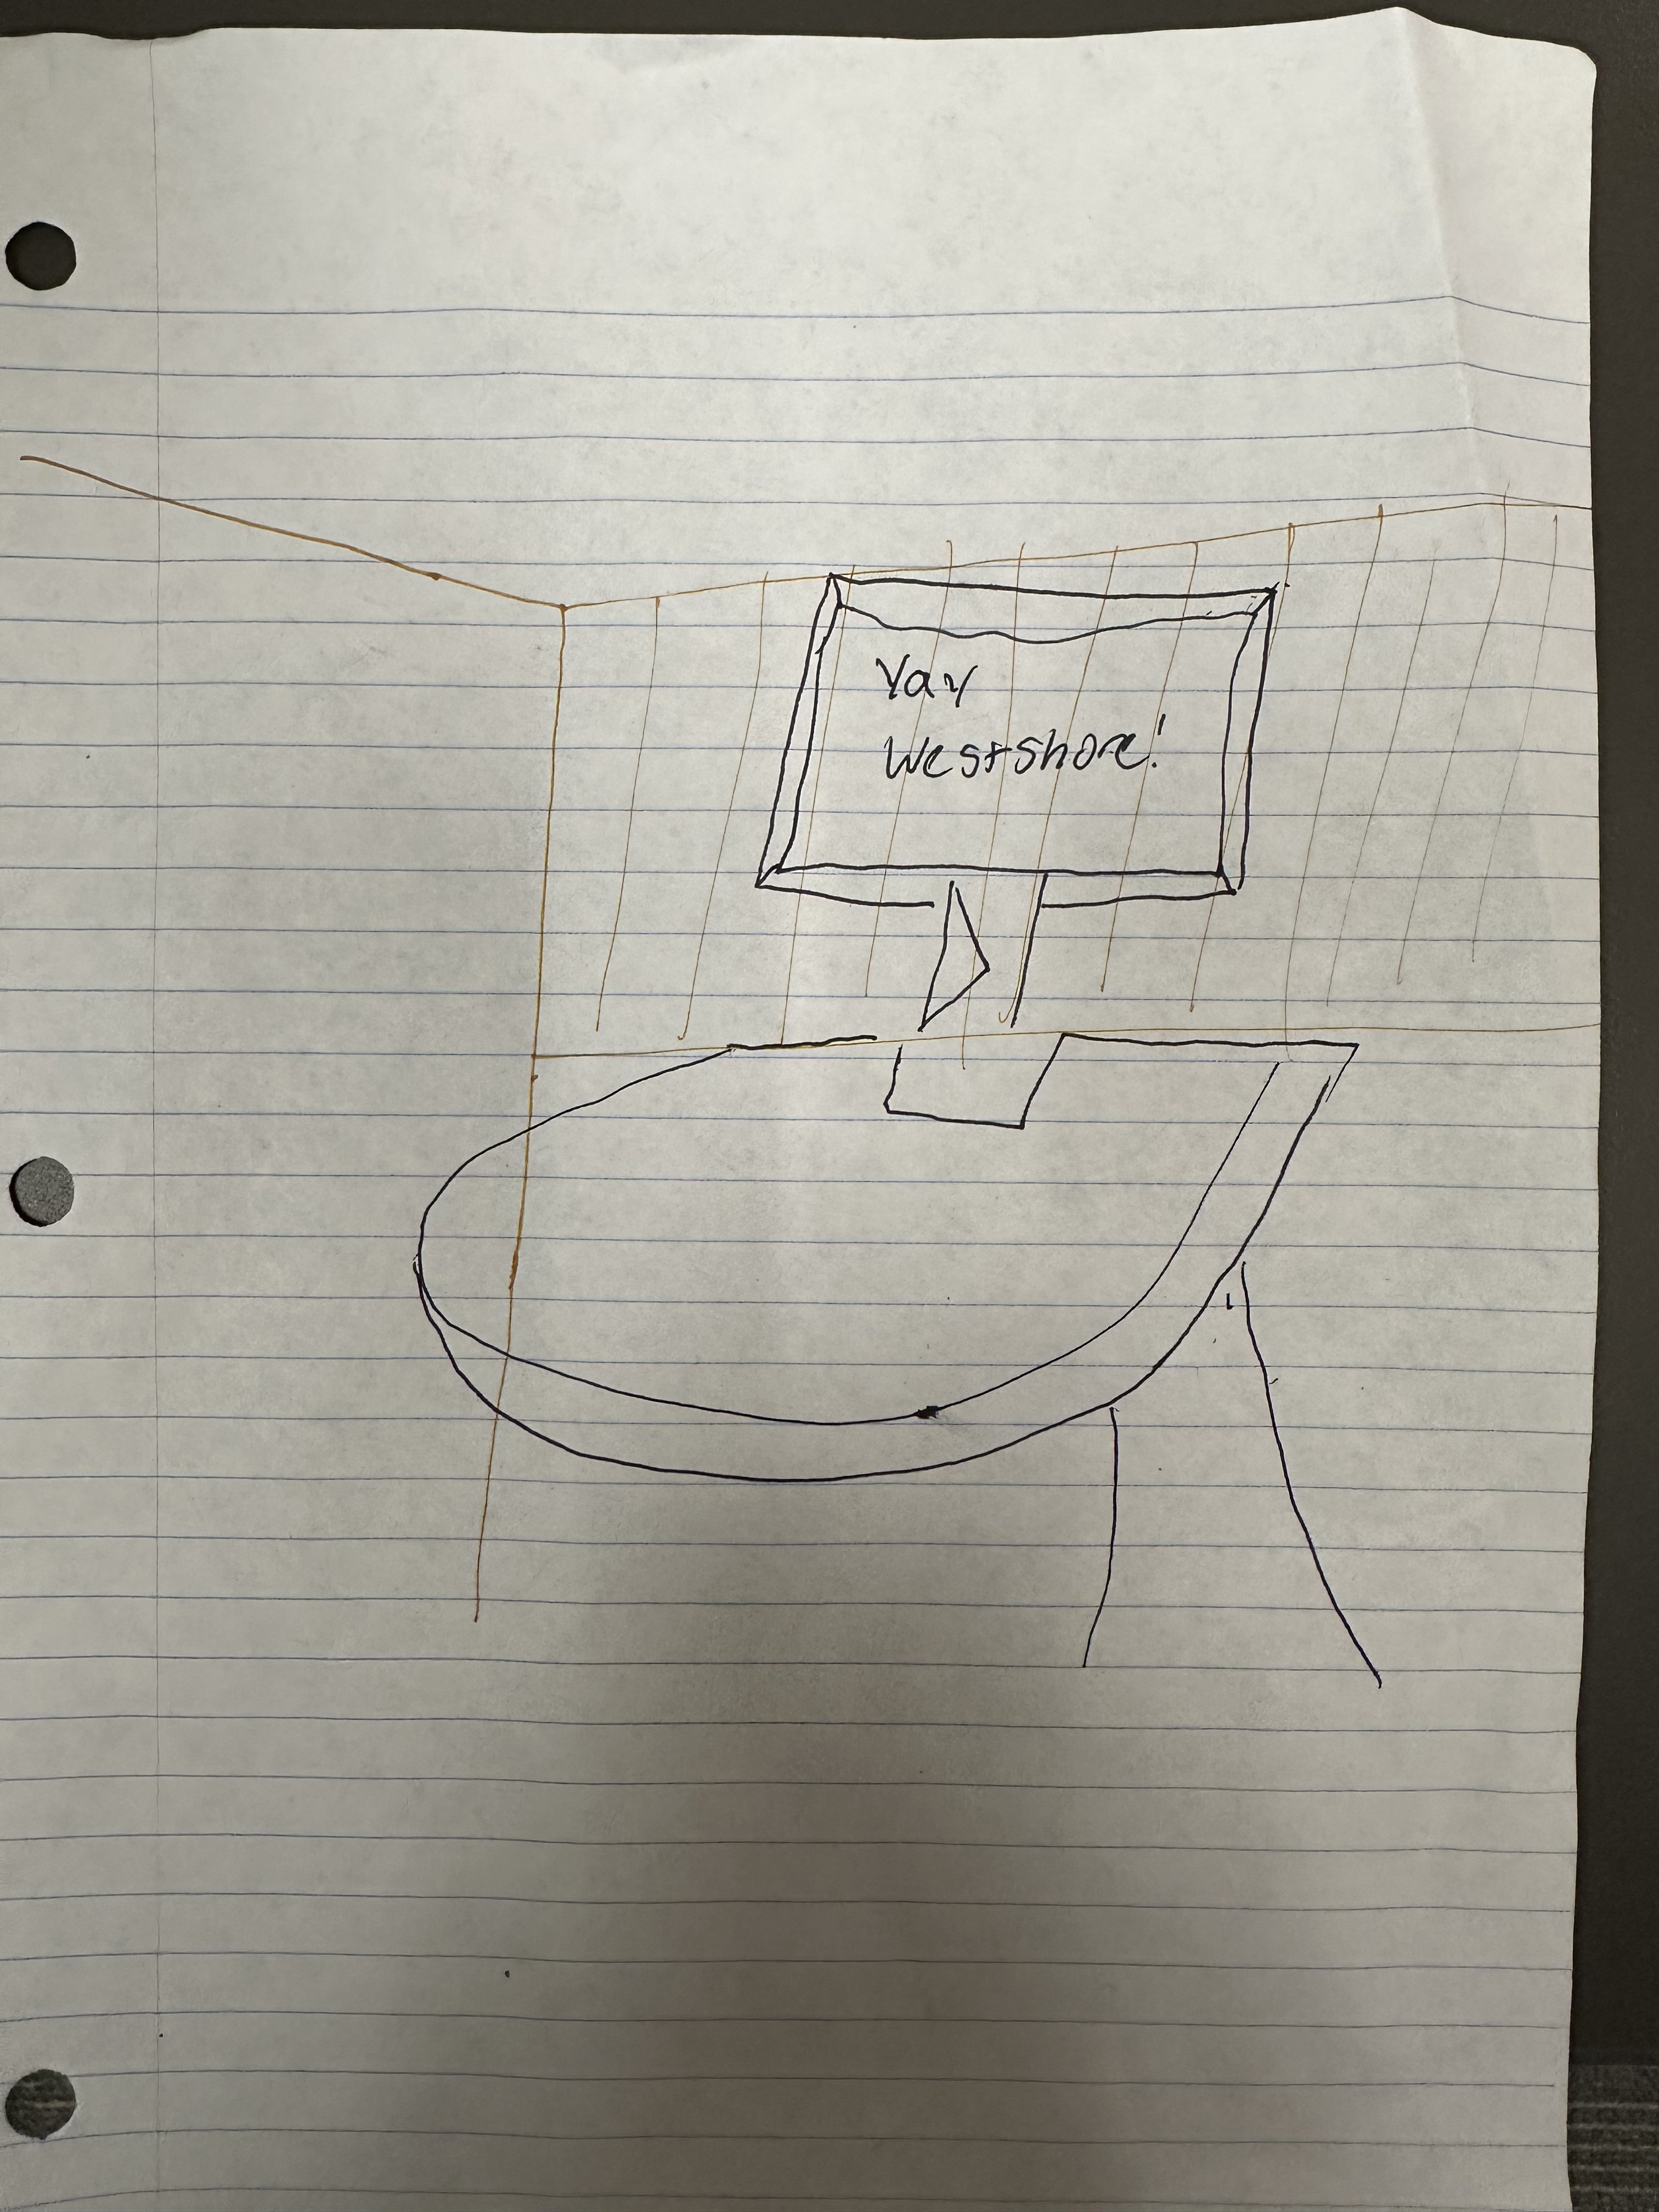
Our team went through a lot to do this, starting with my beautiful Westshore 3D drawing, then making a prototype out of cardboard, and eventually using SolidWorks, creating detailed technical drawings, and collaborating with welders and a corkboard company to bring our vision to life.
The project encompassed the entire engineering design process from initial concept sketches through final production. Mr. Hughes was very clear about our constraints although not so much about his tastes and preferences which of course we had to gently coax out of him. Eventually, we provided! Although I really wanted to do something a bit more unique, the project constraints led us to this very functional piece of custom furniture.
I had my high school credits all done by senior year but my parents did not want me to graduate at 16 so I enrolled in local community college mechatronics for the year! For my entire senior year my schedule was calculus IRL, then sit in library, then lunch, then go to college for rest of school day (till 3:00pm).
I just wanted to learn SolidWorks and use their robot arm but along the way I had to get OSHA certified, so I could operate manual and CNC lathes and drill press, and stock cutter, and even had to get safety training for... using calipers???? Anyway, this all happened because in this class I learned SolidWorks for 3D modeling and technical drawings, and mastered CAM software for CNC programming.
Unfortunately I don't have a ton of pictures of this awesome experience but above you can see my technical drawing of a flange and a hammer I machined as part of the coursework! Notice that lovely knurl. Also turning brass is simply wonderful and manually machining with a lathe is to this day one of my favorite skills I've learned.
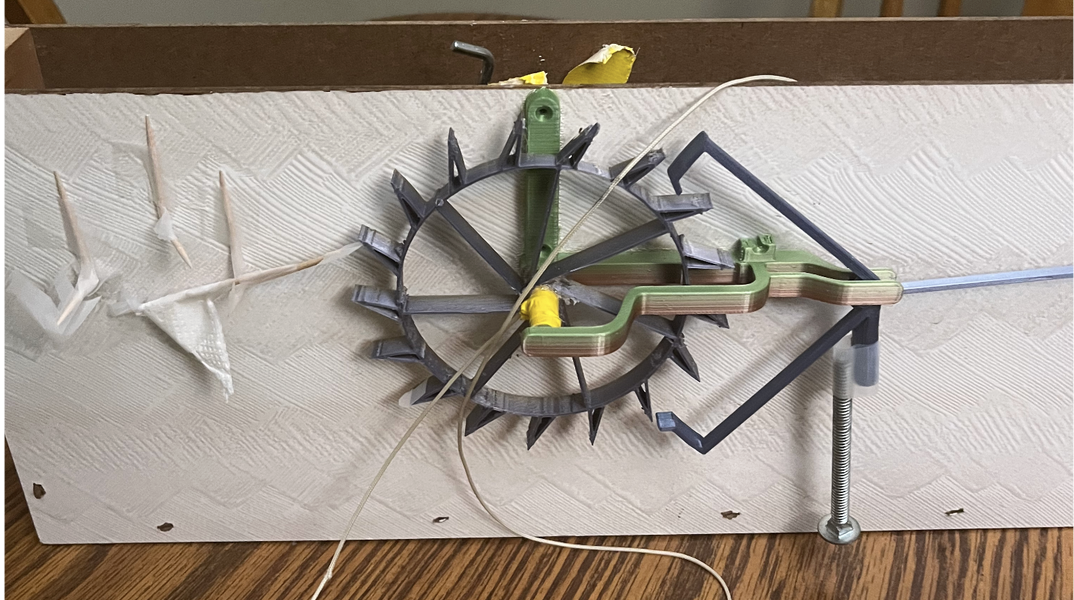
Gravity-powered escapement mechanism that uses the principles of mechanical timekeeping! I wound a string around the center of a gear mechanism and attached counterweights of various weights to test different timing intervals.
By carefully calibrating the counterweights, I was able to control how quickly the escapement mechanism would unwind. The heavier weights created more torque, causing faster unwinding, while lighter weights resulted in a slower, more controlled release of energy.
The escapement mechanism was designed with a small flag at the end of its cycle path. When the weighted string fully unwound, it would trigger the flag to raise, signaling the completion of the timing cycle. This visual indicator allowed for precise measurement of elapsed time without requiring any electronic components.
This experiment demonstrated how gravity can be harnessed as a consistent force for measuring time intervals, similar to principles used in traditional pendulum clocks.
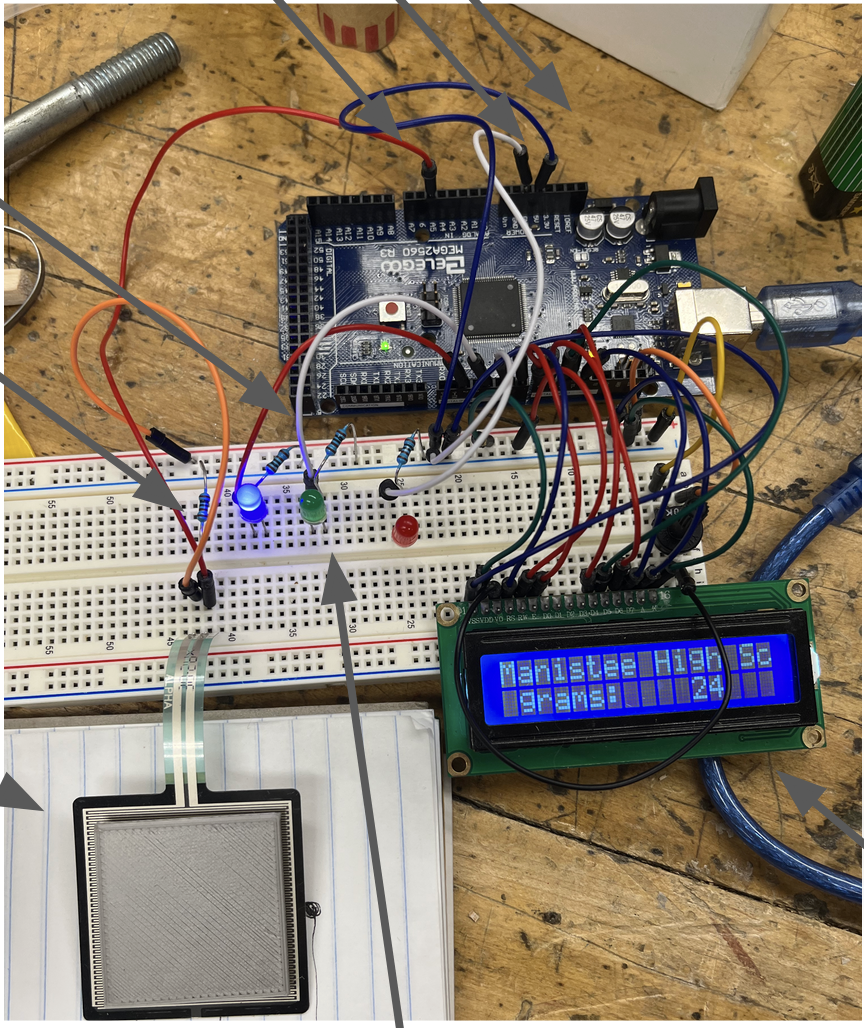
Digital weighing system using an Elegoo Mega microcontroller, a force sensing resistor (FSR), three colored LEDs, and an LCD display.
The system was designed to measure the mass of various small objects placed on the FSR. When an object was placed on the sensor, the microcontroller would calculate its mass based on the resistance change, display the measurement on the LCD screen, and light up one of three LEDs depending on which mass range the object fell into.
This project combined principles of electrical engineering and programming as I had to calibrate the FSR for accurate measurements, program the microcontroller to process the analog signals from the sensor, and create logic for the LED indicators to respond to different weight thresholds.
It was basically just a practical application of resistance-based sensing technology, making simple electronic components into useful measurement tools with visual feedback systems.
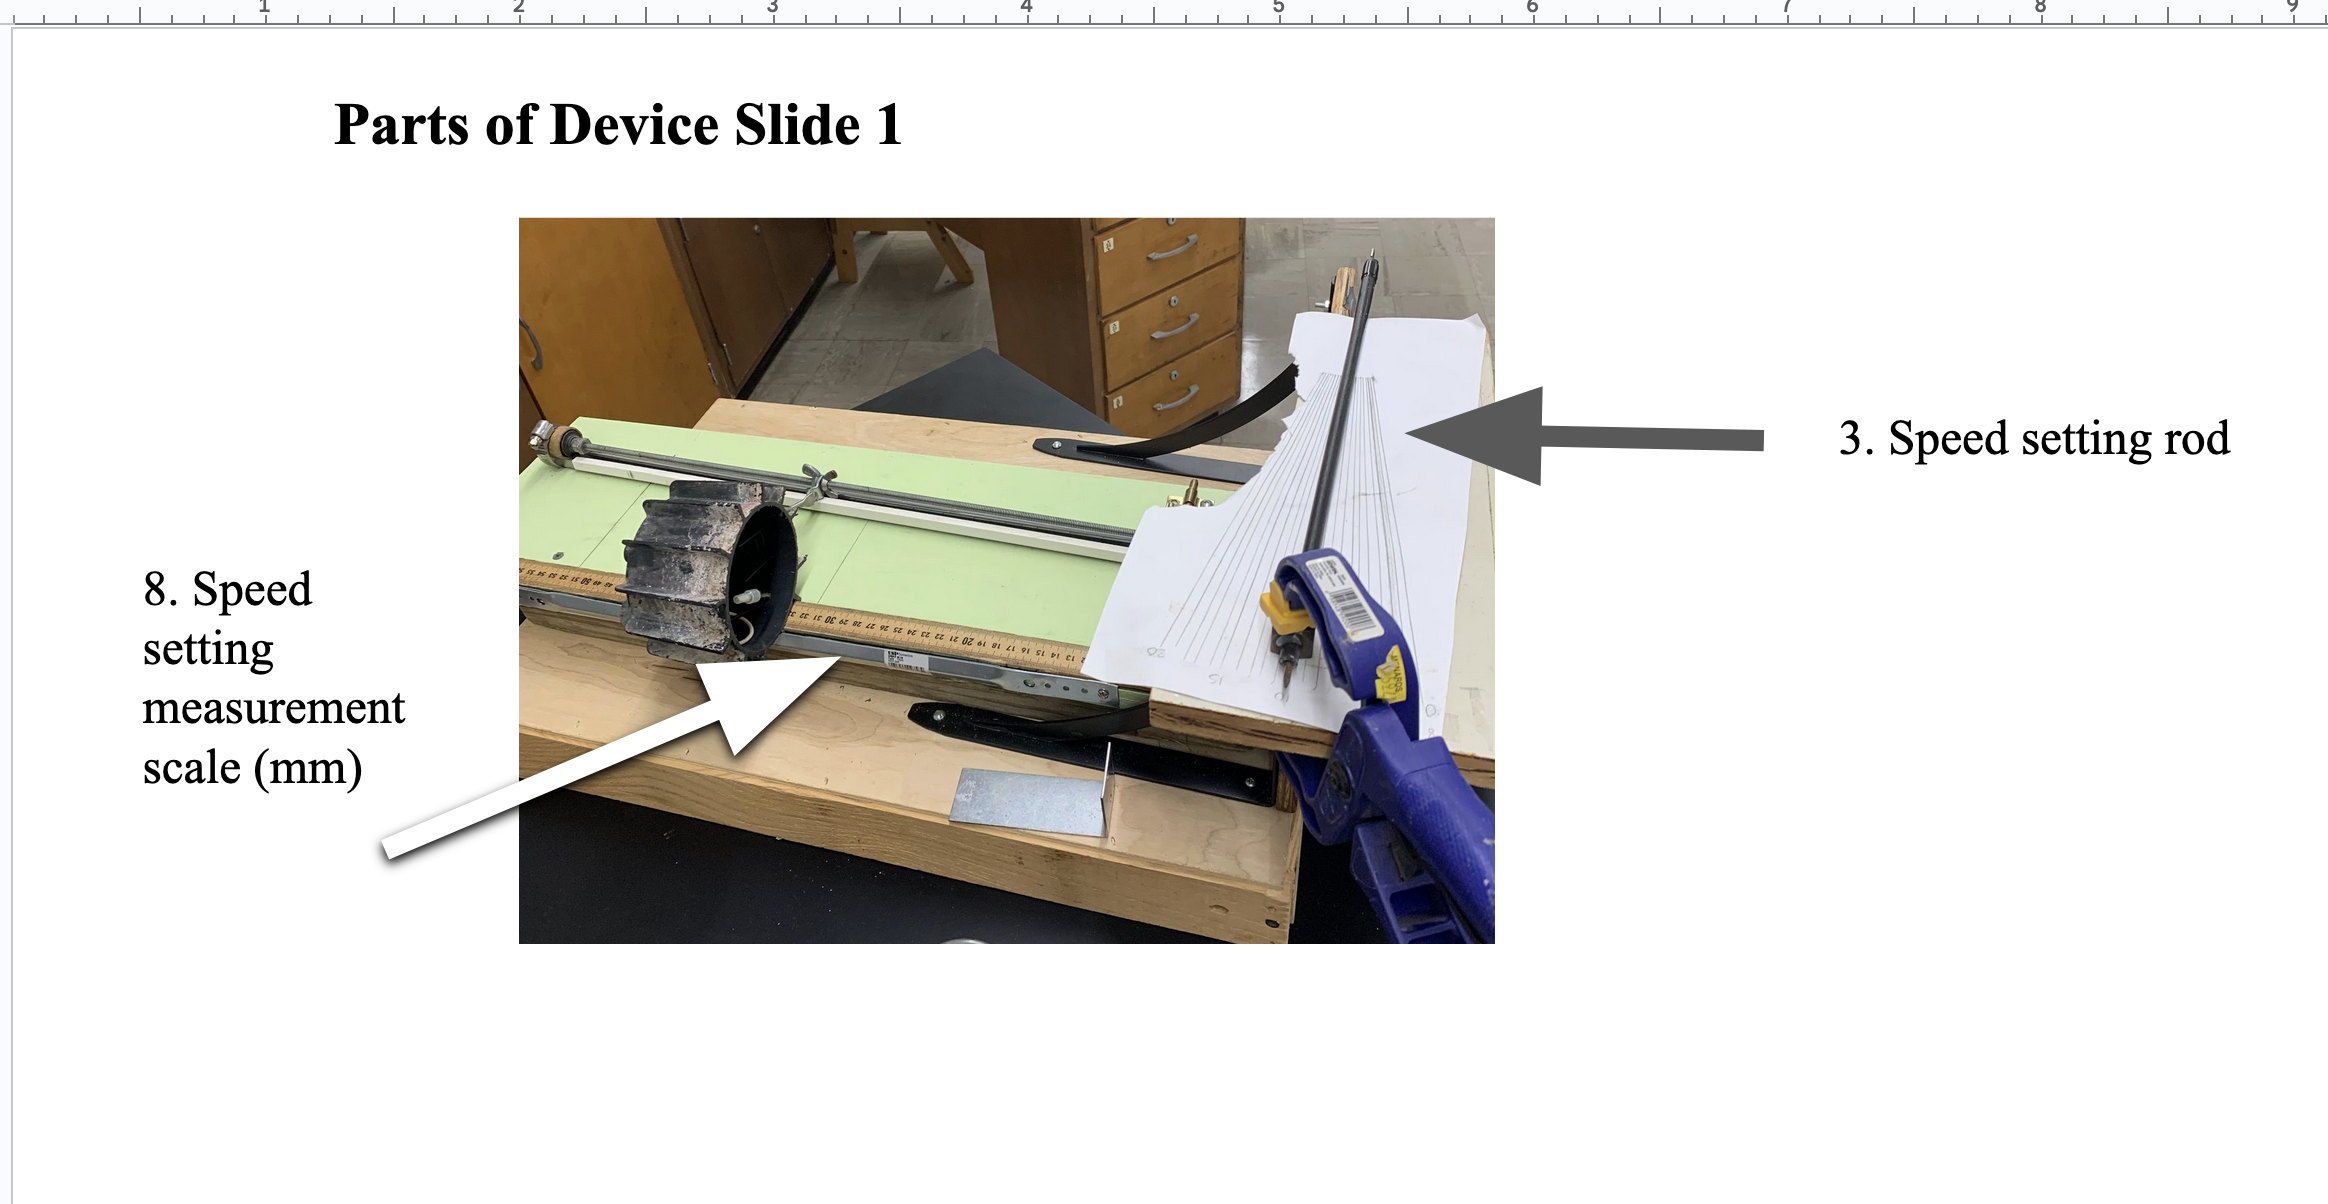
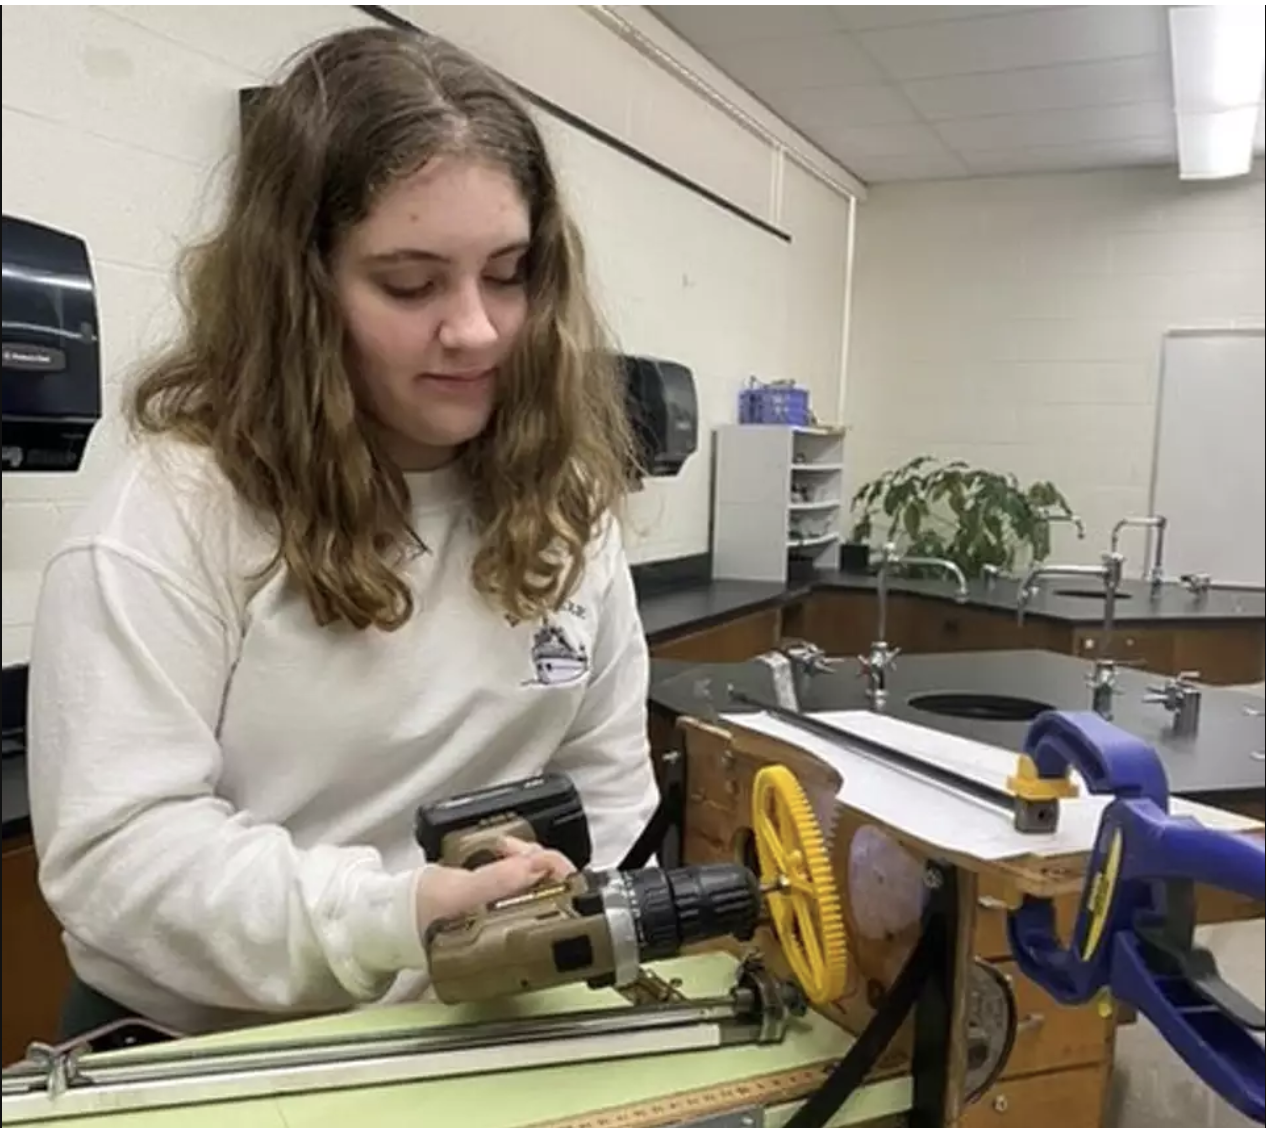
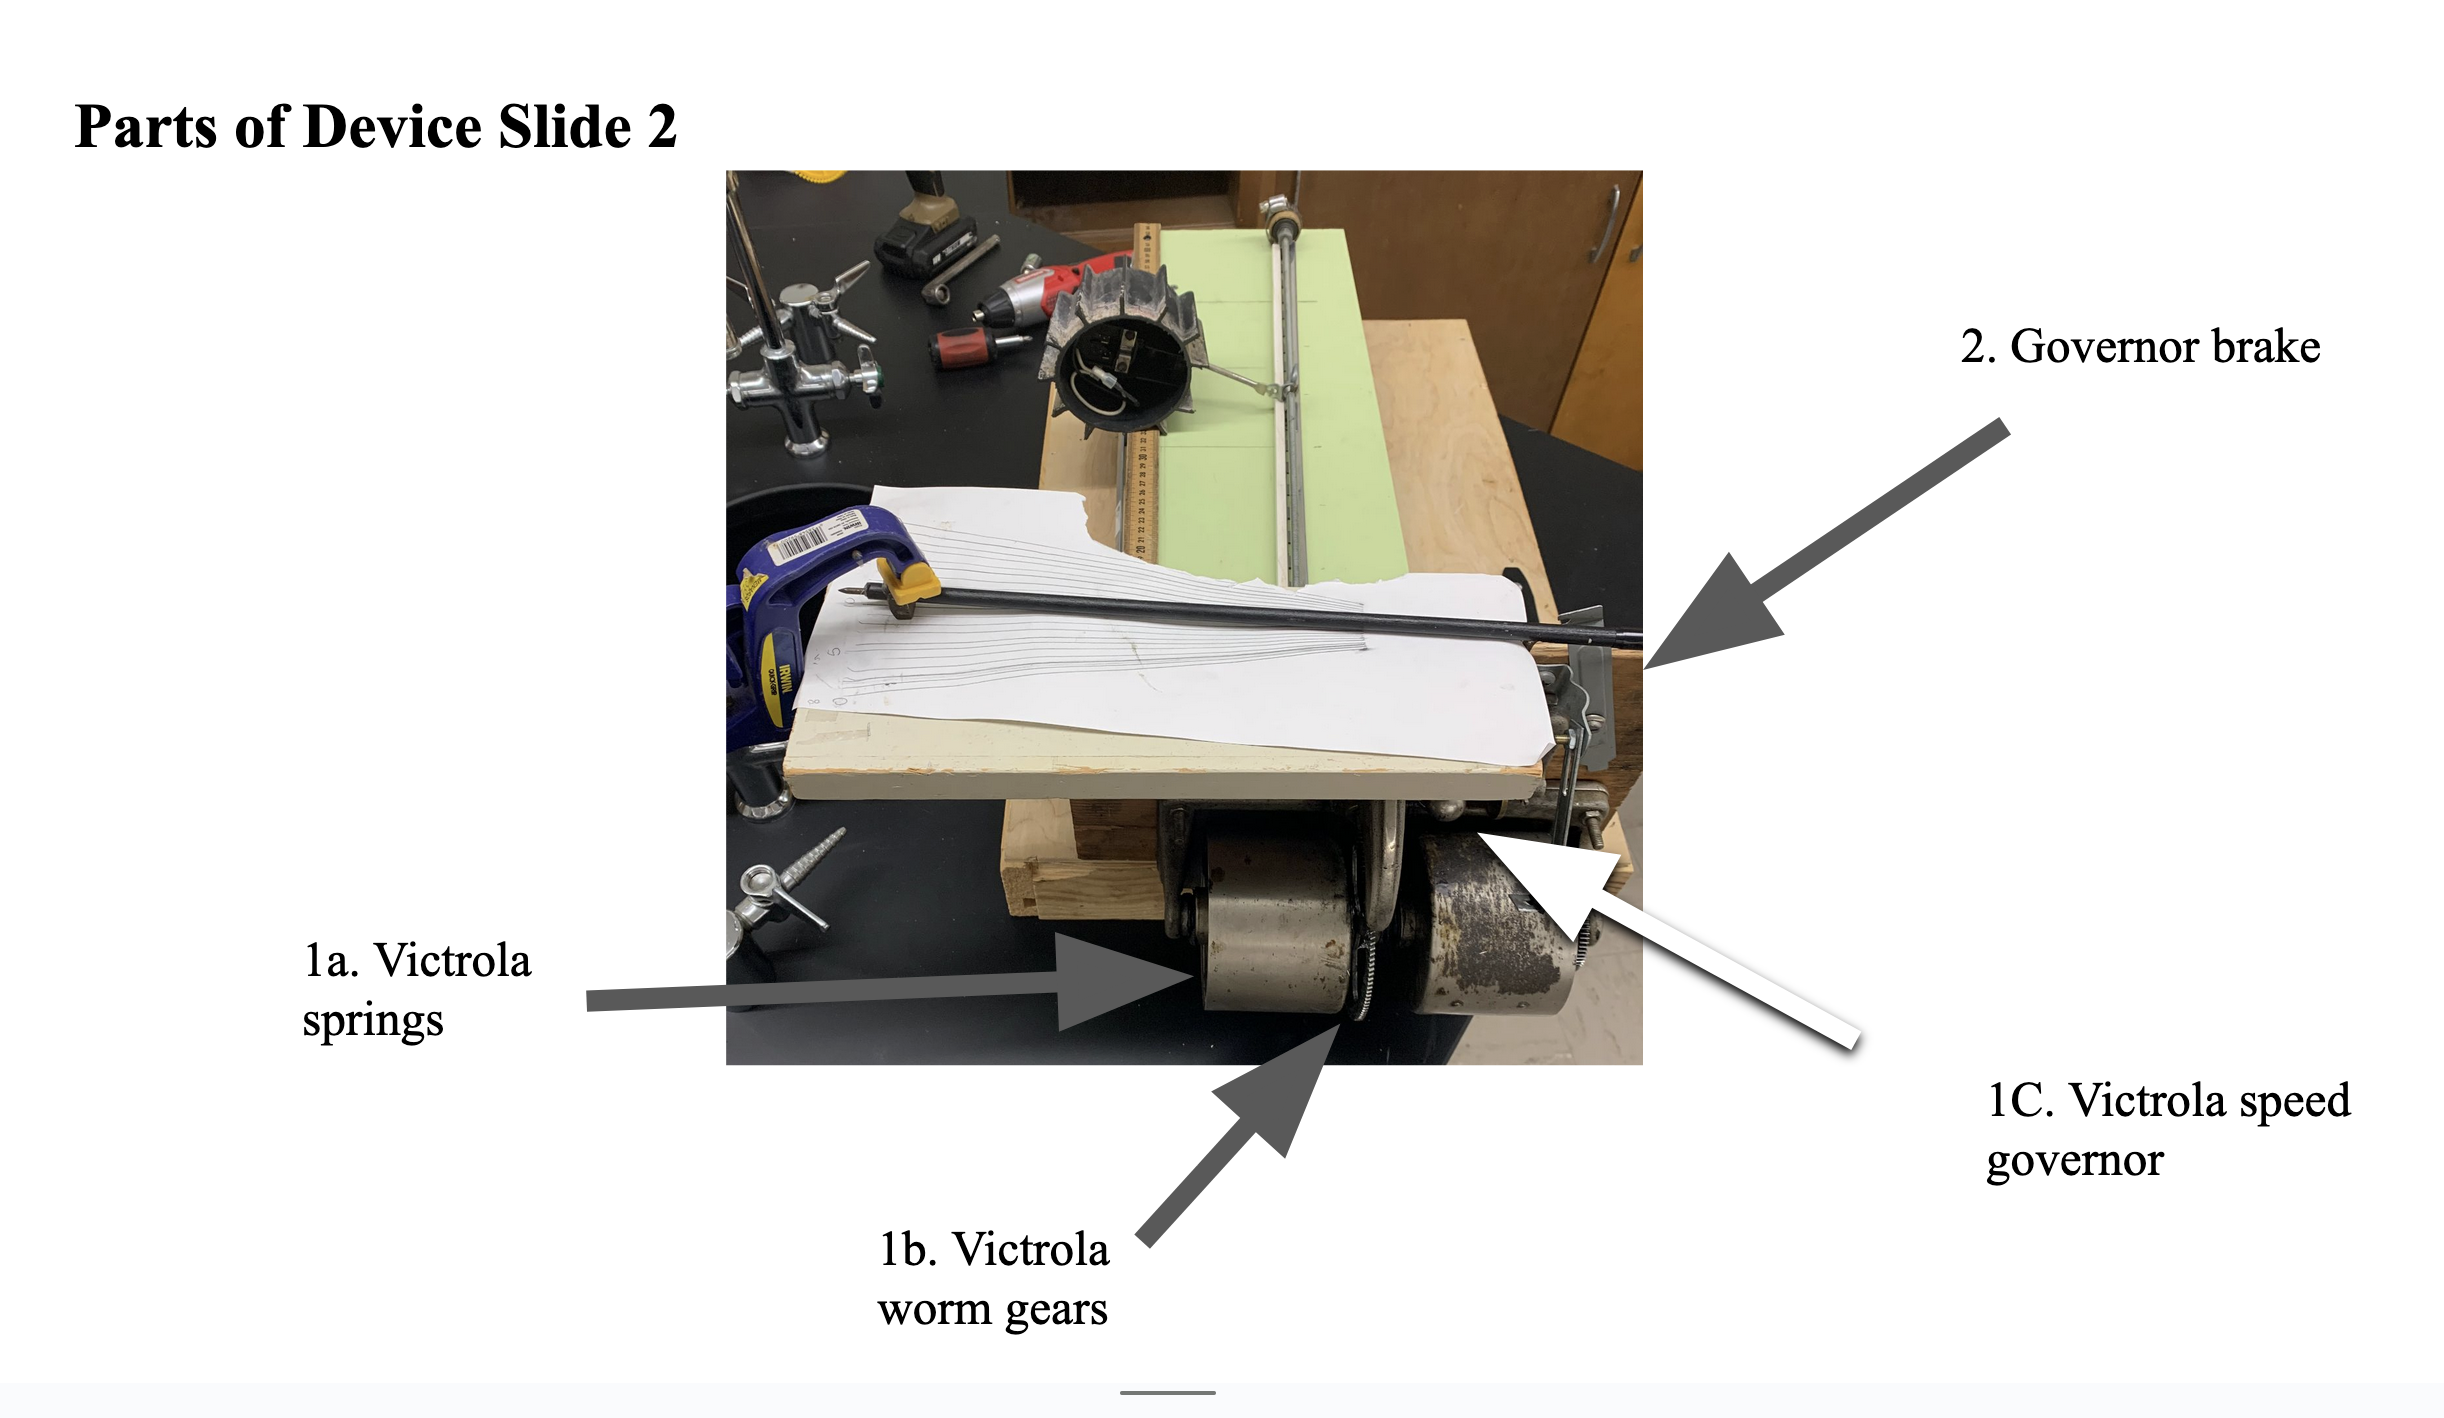
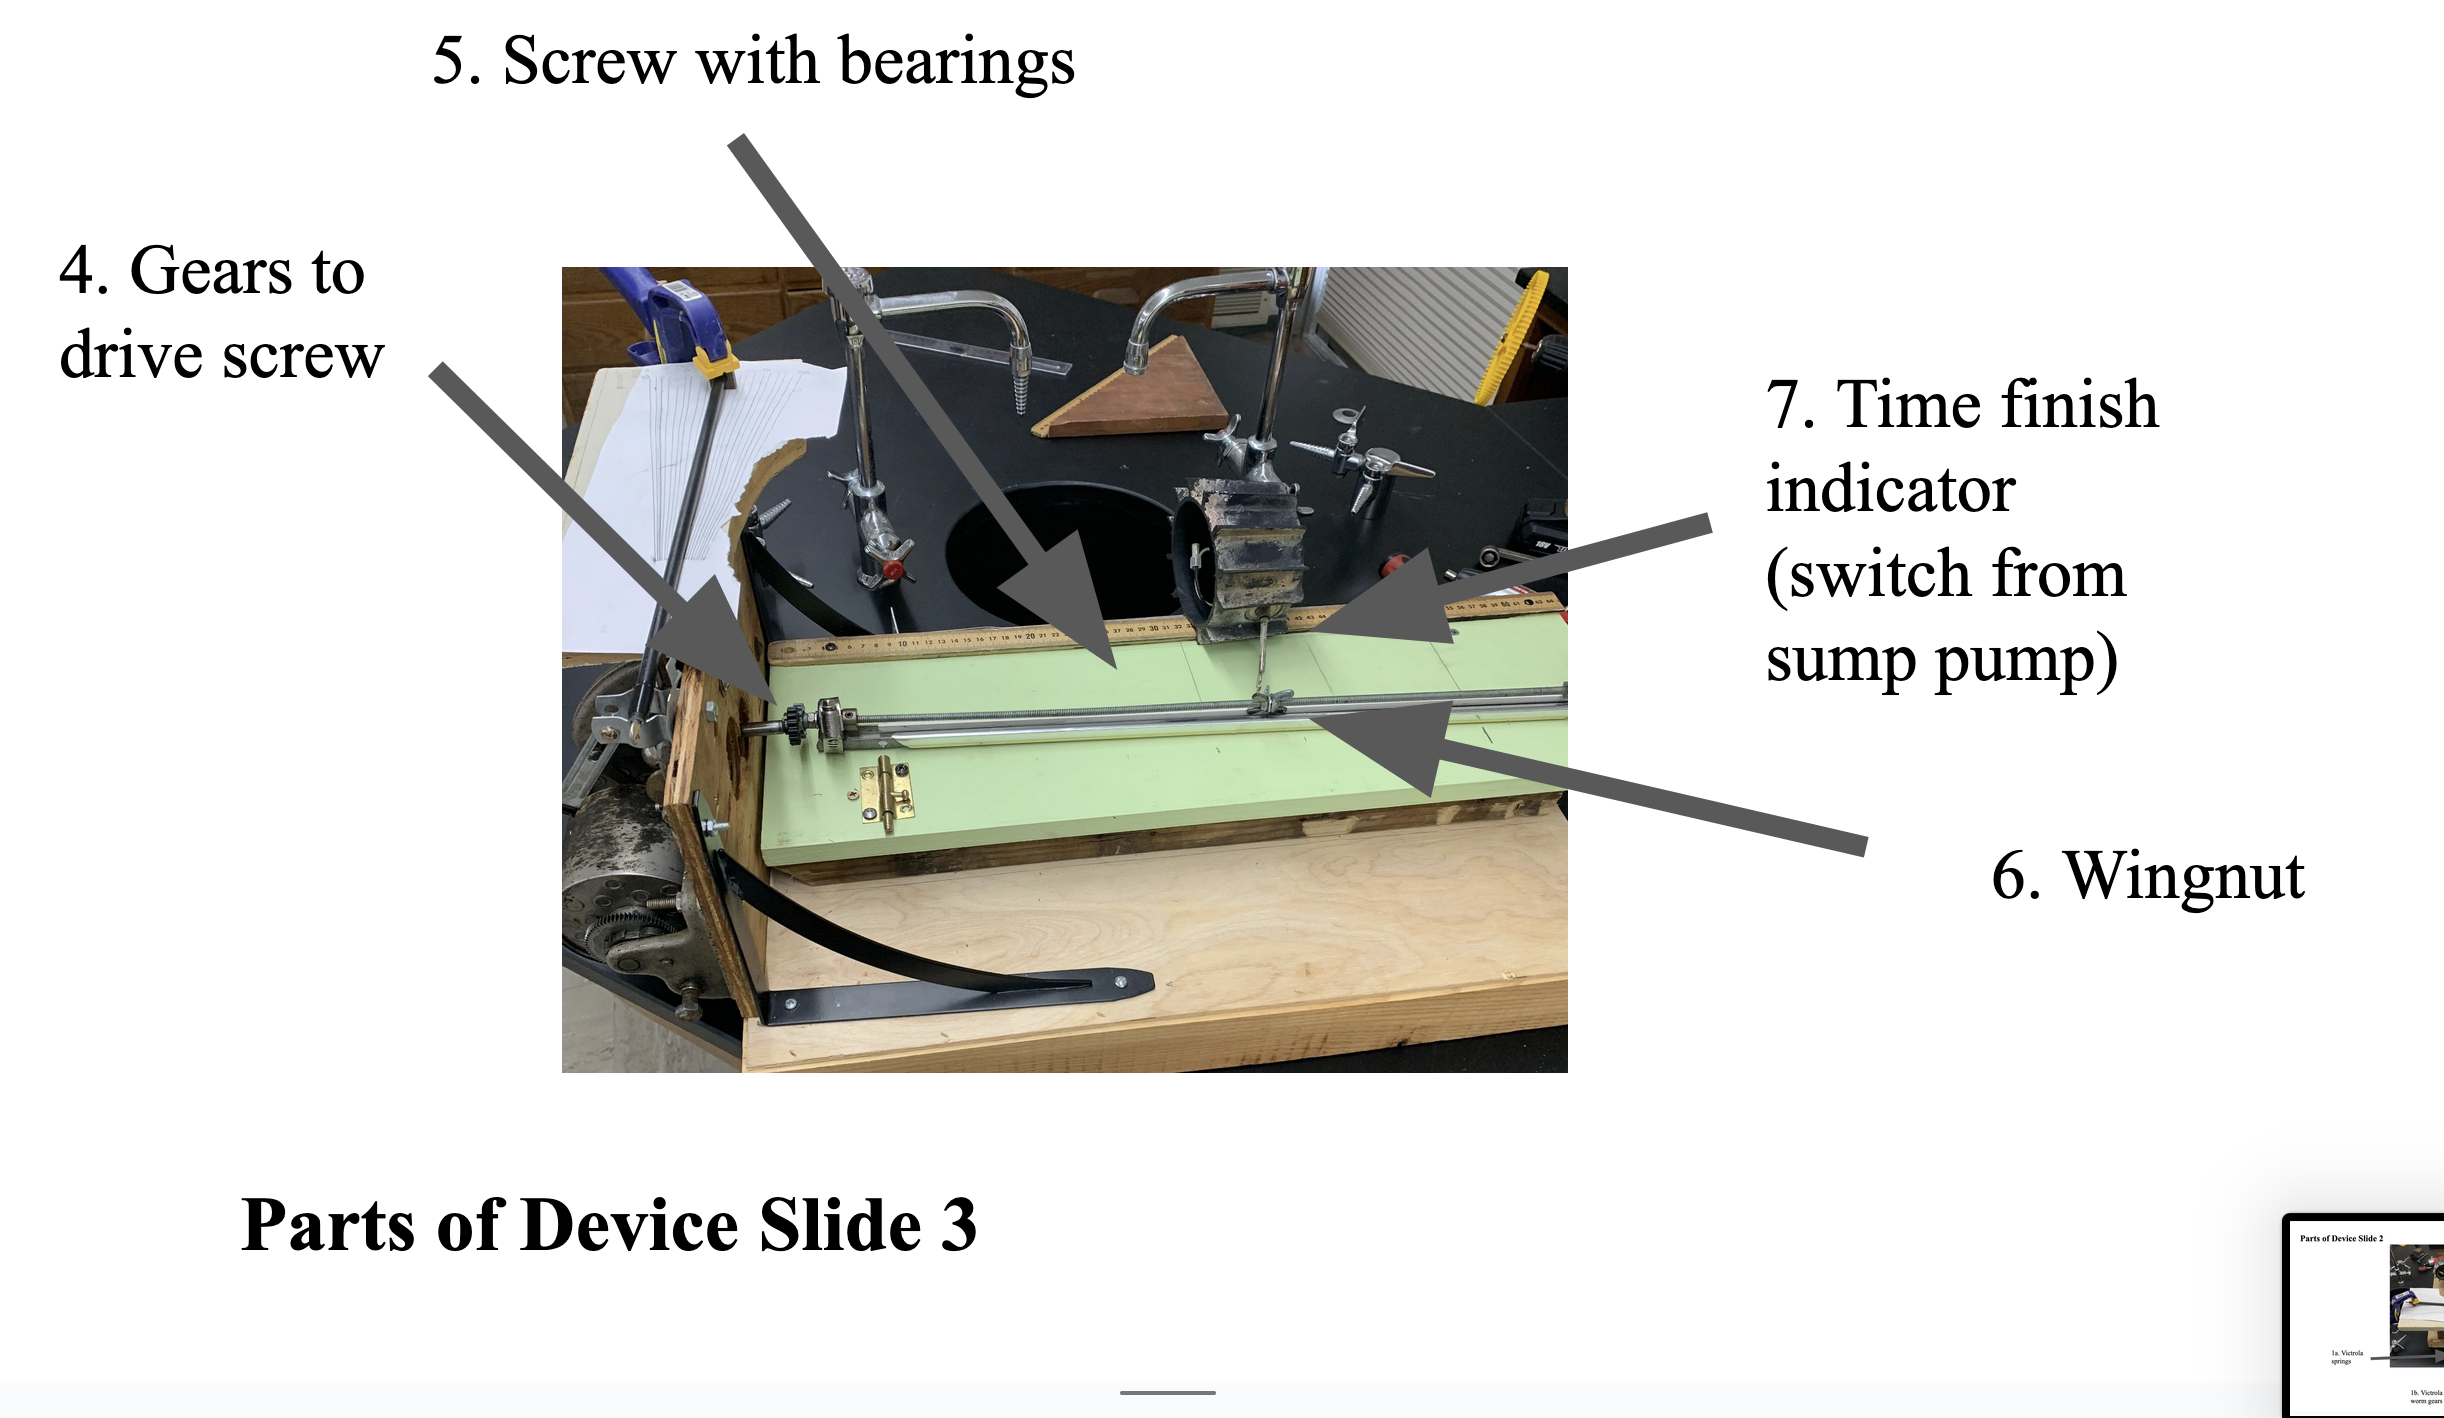
This is a time measurement project I created when I was 16 years old for Science Olympiad 2022. I repurposed a mechanism from an old victrola record player and developed a mechanical time measurement system. During testing, I used an electric hand drill with a custom gear that matched the motor teeth for faster setup, but during the competition I used the traditional hand crank.
The project is about time, music, and space. Since music exists as patterns organized in time — a victrola motor is the perfect device to be repurposed as a timer. Perhaps less enjoyable, but the record player was broken and scrapped for parts, so I gave it a second life!
As opposed to visual arts which can only exist in space, music unfolds exclusively through time, so temporal organization is fundamental. The same governor mechanism that once controlled the precise timing at which music was orchestrated on the victrola also served to translate to physical space through a wingnut and reliably predict time itself given spatial indicators.
By measuring the distance traveled by a wingnut on a threaded rod, controlled by the speed governor's regulation of the screw's rotational motion, I could accurately determine how much time had elapsed—creating a non-electronic timer.
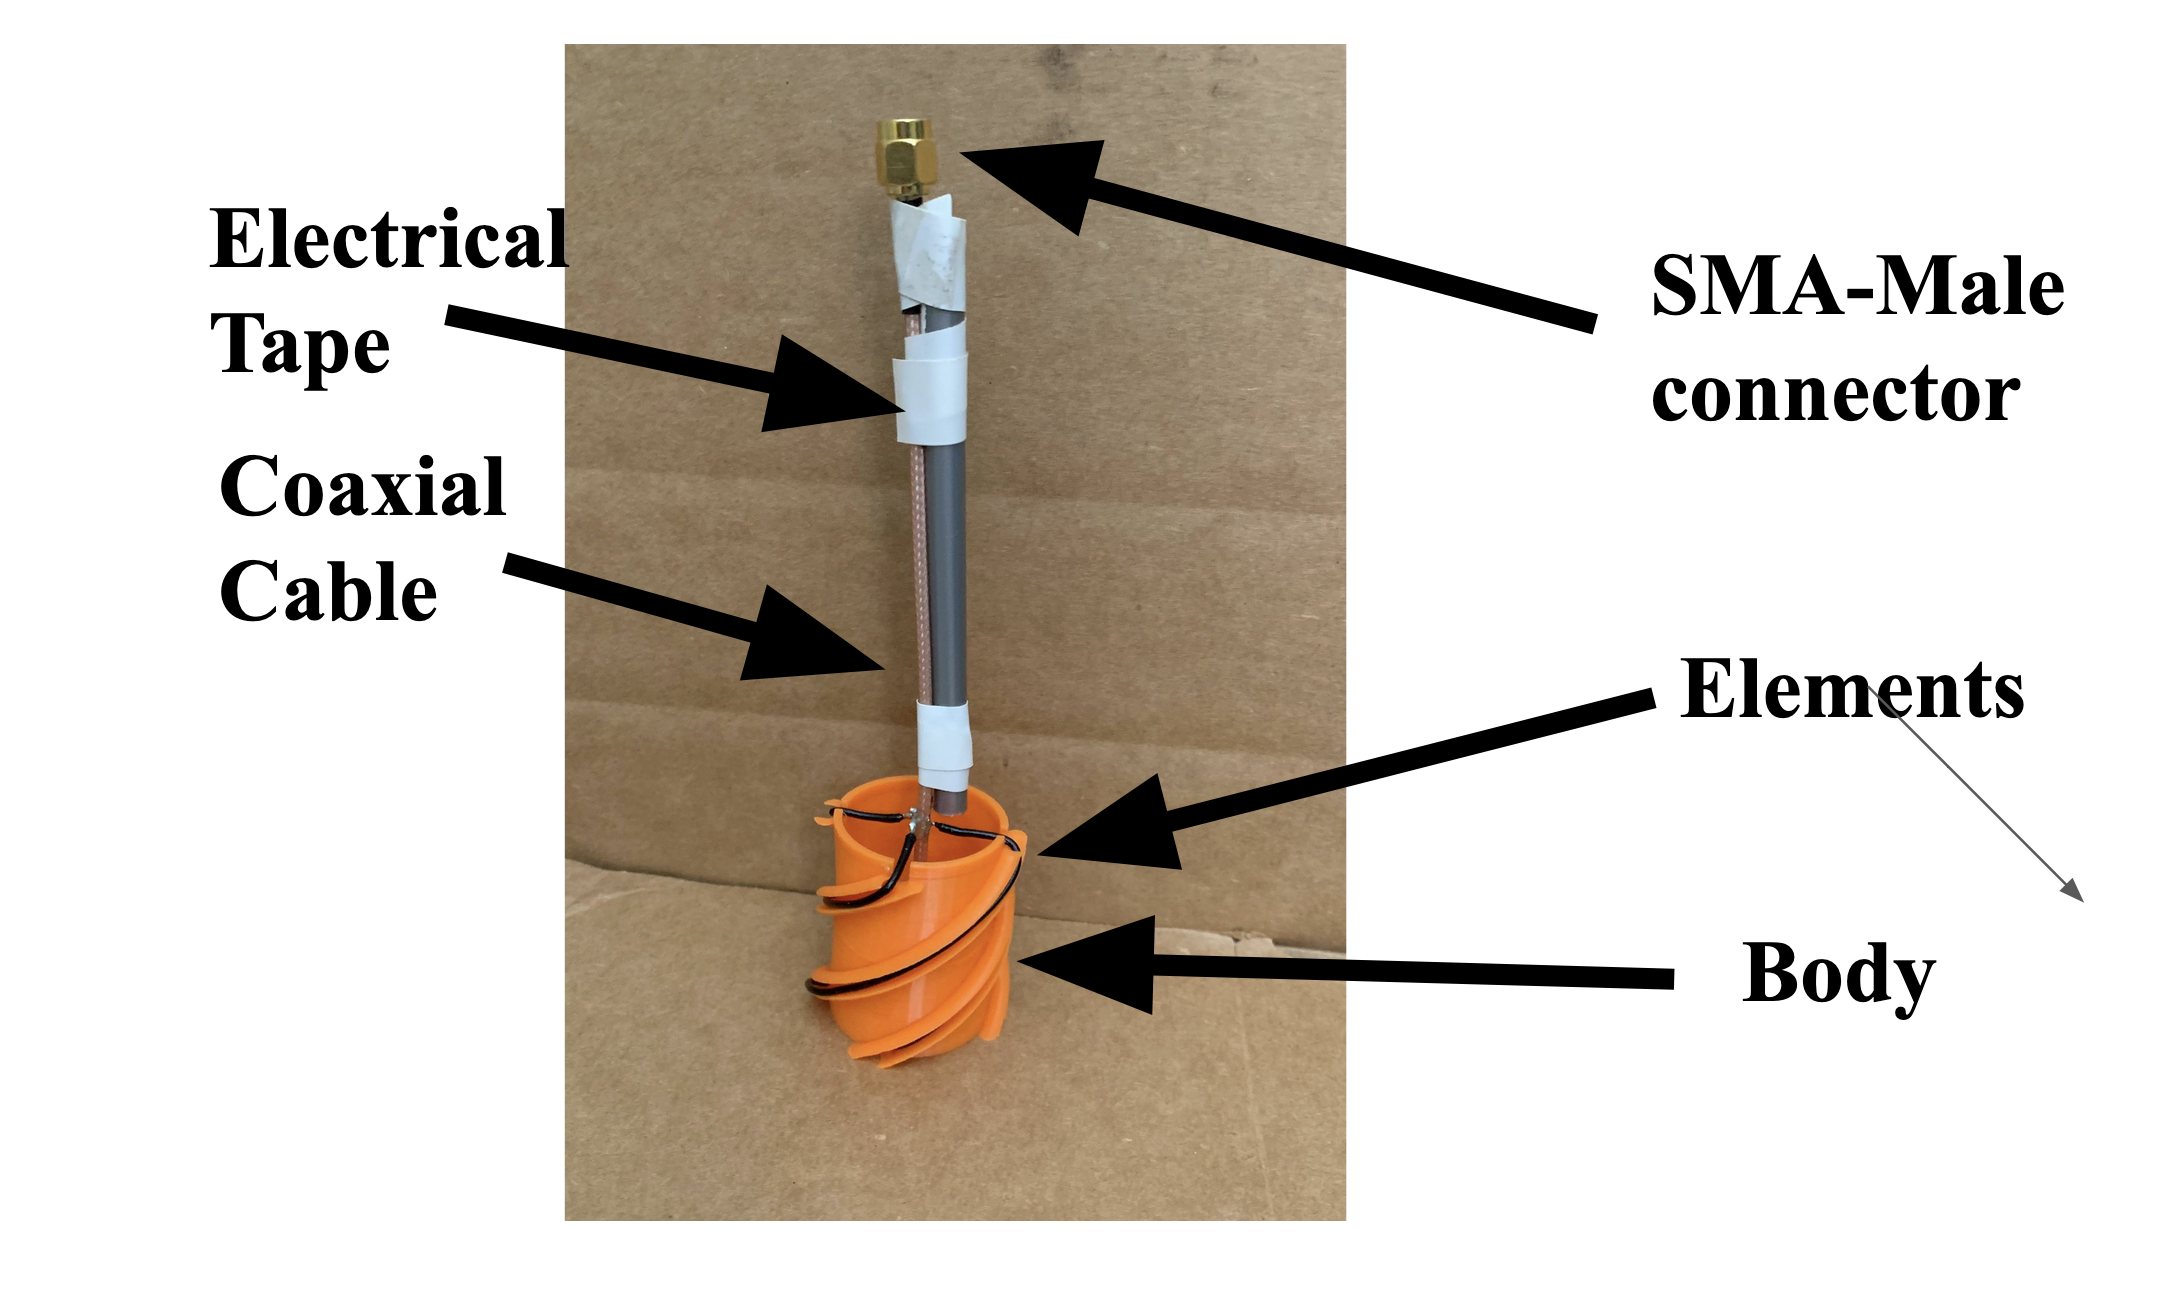
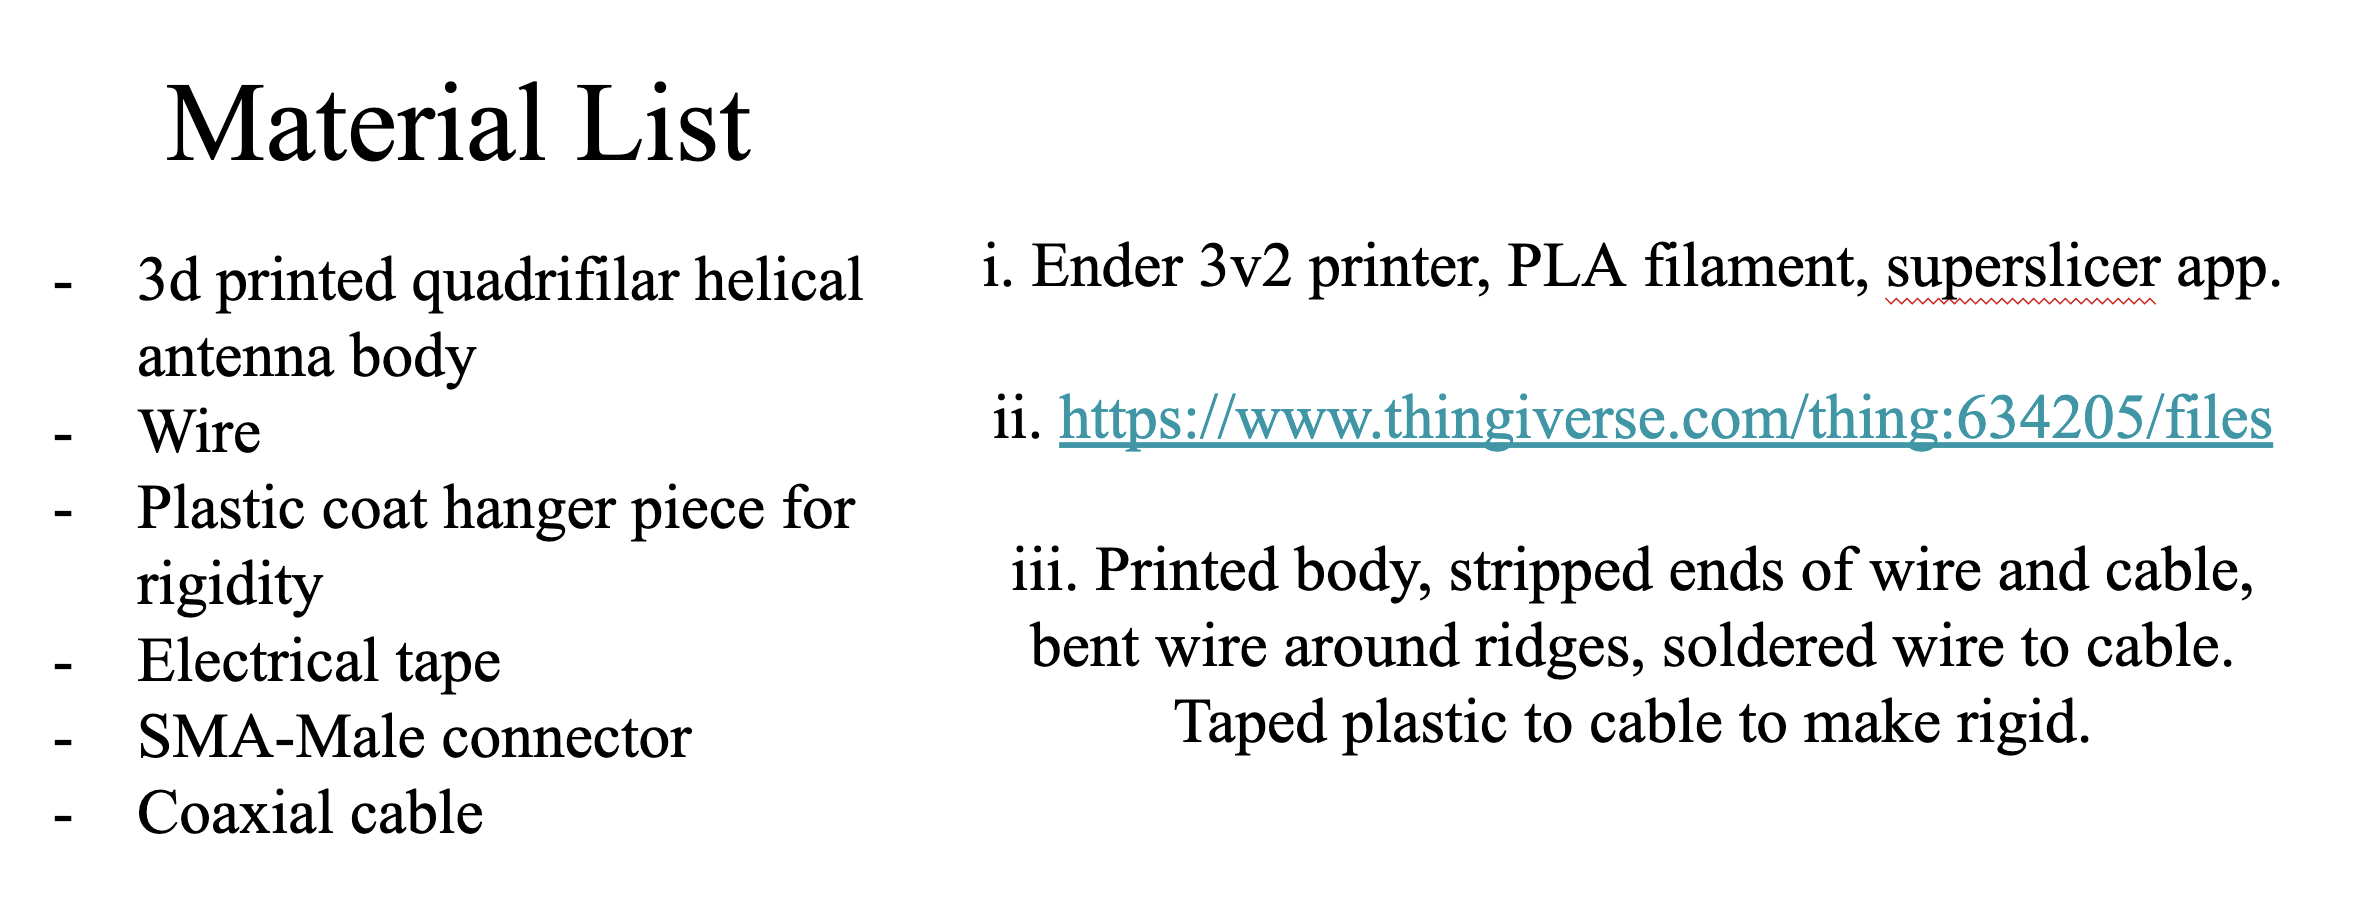
For one of my Science Olympiad competitions, I made a quadrifilar helix antenna operating at 2450 MHz that transmitted signals with remarkable reliability at maximum distance.
I specifically chose a quadrifilar helix design because of its hemispherical radiation pattern, think like a cardioid or a rounded cone shape centered around the antenna axis. This pattern provides excellent overhead coverage, is able to reject multipath signals (reflections from being inside) making the signal way clearer than a dipole, AND it uses energy more efficiently than a dipole because it doesn't point radiation towards the ground.
The 3D printed housing made it super lightweight and durable. This made it a much safer bet for the competition environment compared to other antenna types. The construction process involved precise measurements and careful assembly/soldering to ensure the helical elements were positioned correctly for the desired frequency.
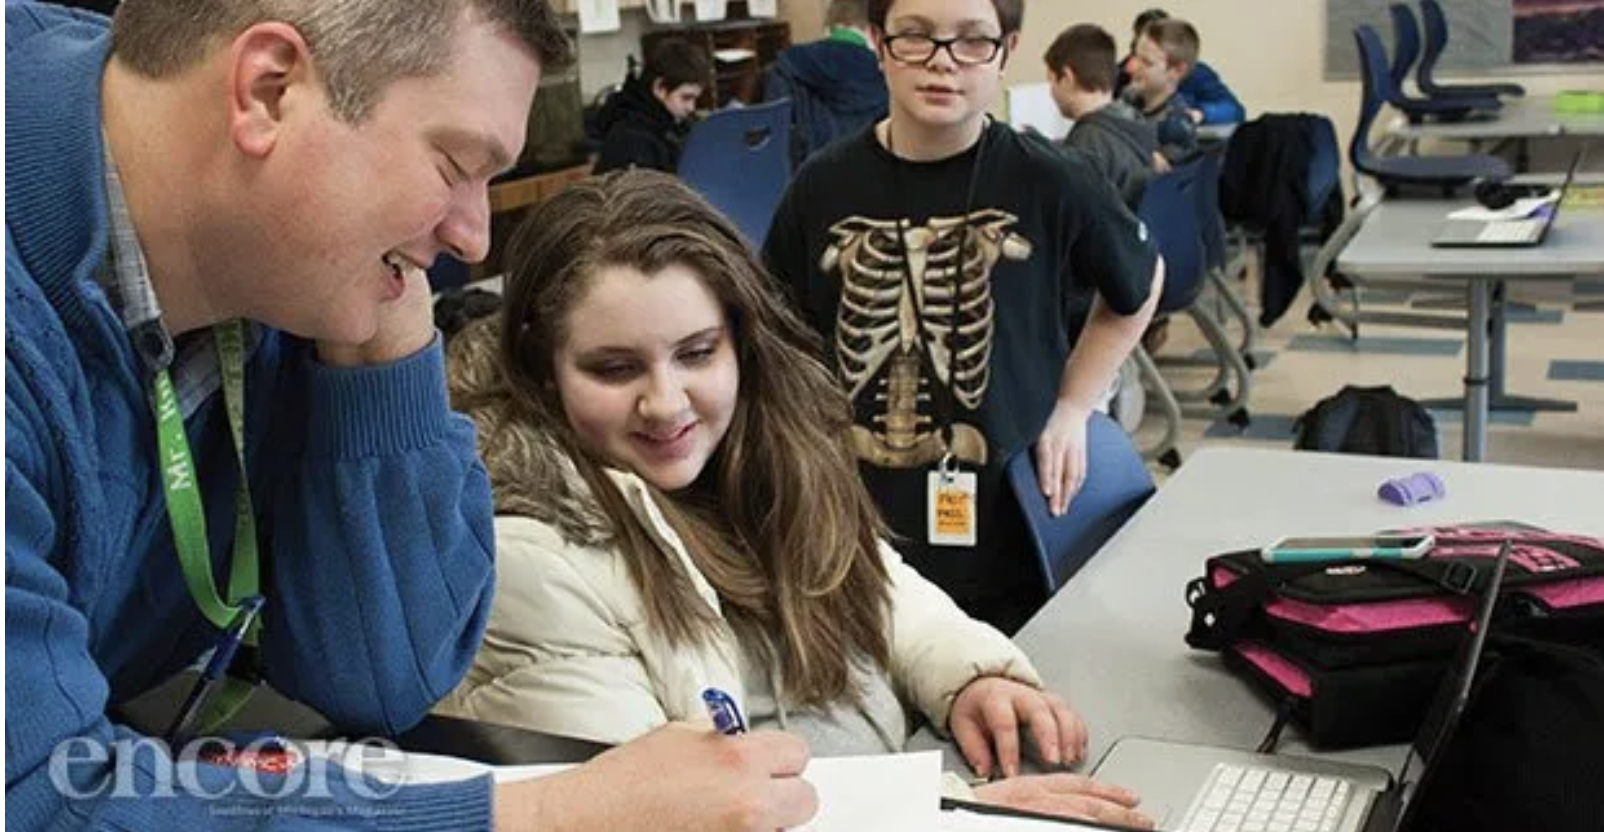
I started the engineering club after realizing we could bring our science class designs to life through 3D printing. In Mr. Knack's class (pictured with me above), I learned TinkerCAD and discovered my passion for creating physical objects from digital designs.
Using my dad's 3D printer, I made all sorts of things - from fidget spinners that I sold during the 2016 election season to a TARDIS from Doctor Who for my teacher. I was fascinated by exploring new ways to use CAD software to design increasingly complex objects.
What started as curiosity turned into a skill that allowed me to create custom designs for classmates and teachers who wanted various items. Through the engineering club, we were able to collaborate on designs and share our knowledge with other students interested in making things.
The local paper even wrote an article about us! Not-So-Weird Science (Encore Magazine)